It’s been a minute since I’ve added to my deep dive into garden plant families. If you look back through the posts, you’ll find we’ve already covered the mints, the brassicas, the nightshades, the alliums and the parsley family (the series is listed under “gardening” on the DIY Homesteading tab above).
It’s time to talk about one of my hands down favorite plant families, Fabaceae, also known collectively as the legumes, aka beans, peas and their kin. If you’ve been reading my blog for any length of time, you know I have a deep love affair with most dried beans. One that isn’t showing any signs of abating since my early childhood bowls of ham hock and beans and my love of refried beans at a Mexican restaurant (truly, its how I benchmark the restaurant – if you can’t get this simple staple right, everything else falls short).
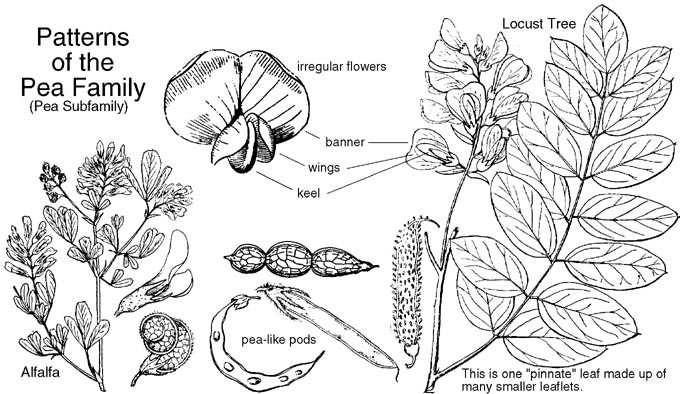
Also found in the Botany in a Day book by the same author, Thomas J Elpel. Book is highly recommended.
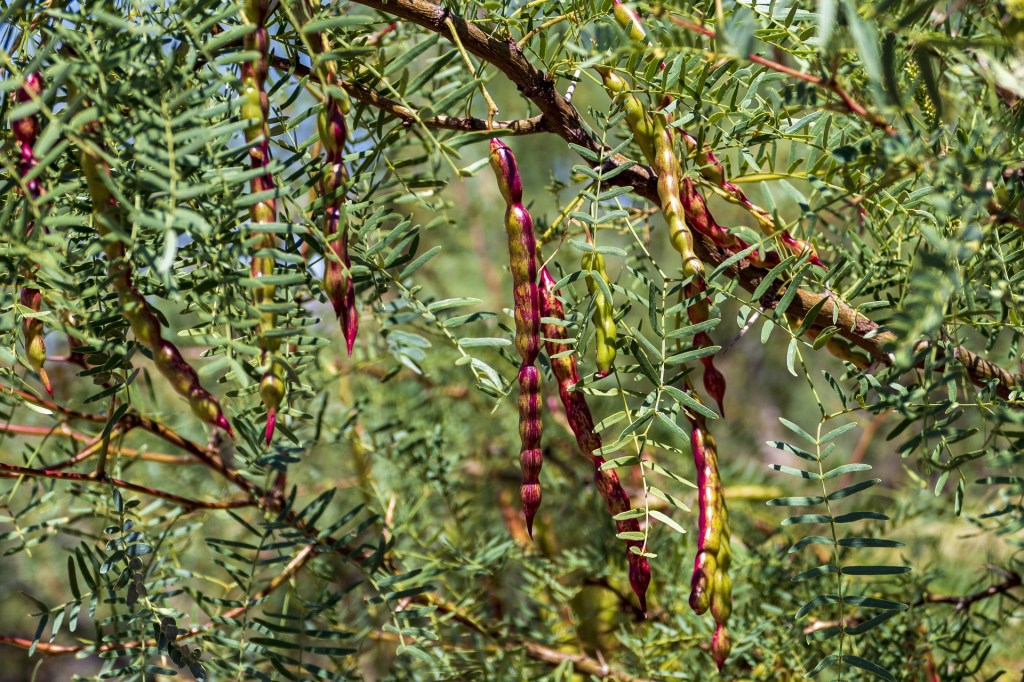
The Fabacaea is the third largest plant family in the world (behind only orchids and asters). To identify garden plants in this family, first look to their flowers. Many (all in the pea subfamily) have flower petals that form a distinctive banner, wings and keel shape. Fruit matures in a pea like pod with several to many seeds. Other subfamilies of Fabacaea that don’t share this distinct flower shape often have pinnate leaves (leaflets arranged opposite each other along the stem) and distinctive pea-like pods that open along two seams. If you’ve ever seen locust, mimosa or acacia trees, you’ve seen these character traits. Common wild lupine is also in the fabacaea family, as are carob, mesquite and tamarind.

Once you become aware of this family, you’ll realize that SO MANY plants you are familiar with are included. Beans and peas of course, but also other pulses such as chickpea and lentils, soy and peanuts, licorice and jicama. And of course, common ground covers, pasture plants and cover crops including clovers, alfalfa and vetch. Many of the wild fabacaea can be toxic to you and to your grazing animals, so don’t go assuming that just because you can eat a garden pea, you can also eat any pea-like seed you find. The death of Chris McCandless of “Into the Wild” fame is attributed to the ingestion of a toxic legume seed.
Legumes are known in the botany world for their ability to fix their own nitrogen. Seventy eight percent of our atmosphere is made up of nitrogen, as N2. Plants need a form of nitrogen in order to grow (its the N on the NPK numbers on your bottle or bag of fertilizer) but they can’t take in atmospheric nitrogen. They must wait for it to break down and change form in the soil with the help of soil microorganisms. This is part of why caring for the soil microbiome is SO important – they are literally the engine of plant growth.

Legumes are able to form a symbiotic relationship with nitrogen-fixing soil bacteria called rhizobia. The rhizobia form nodules (bumps) on the plant root, within which the bacteria can convert atmospheric nitrogen into ammonia that can be used by the plant. In other words, legumes have found a short cut in the nitrogen cycle. This is no doubt part of why they are such a large plant family.
Rhizobia are naturally occurring in most soils to some extent, but you can also buy “legume inoculant” to ensure that your legume seeds get a good dose when starting out. Interesting, its not a one size fits all situation. There are different rhizobia that are better for different kinds of legumes. Most consumer garden packs of inoculant contain a mix of species to cover most of your bean and pea needs. Fun fact, once you’ve inoculated your soil, the rhizobia stick around for a good long time (up to 5 years) so you shouldn’t need to reinoculate your soil every year unless you’re moving your beans and peas around the garden a lot.

Side story. Once upon a time, I ran a native plant nursery in a small town in Arizona that grew plants for habitat restoration on the lower Colorado river. The hand off between the former manager and myself was not smooth, and it turned out we had a BIG order for mesquite trees that I was unaware of for a good while. Desperately trying to grow these trees in the wrong season, I built a large greenhouse using plastic sheeting and wood posts. I then bought a garden variety legume inoculant and used it on half of the mesquite seeds, figuring it couldn’t hurt and it might help. The difference between the inoculated and the uninoculated seedlings was astounding. They were literally twice as large. Go rhizobia!
Now you may have heard that legumes add nitrogen to the soil, but that’s a bit of a misnomer. As I discussed in this blog post of garden myths, there is generally not enough EXTRA nitrogen being formed by the rhizobia to be feeding the legume plant AND other nearby plants. If extra nitrogen IS moving through the soil, its in very small amounts, and depends on conditions not fully understood, including soil type, other available nutrition, moisture levels, other microorganisms etc.
MOST of the nitrogen from the rhizobia association is stored in the legume plant itself. And then most of that gets used up when the plant produces seed. So even the left over plant residue, if tilled into the soil to feed the following year’s crop, will not have a huge impact on available nitrogen in the soil. Tilling in a “green manure” cover crop of legumes JUST as they start to bloom is the most effective way to have the soil benefit from the legume nitrogen stores. But remember, this residue will take a good while to break down and won’t be immediately available to the next crop. Green manures take quite a bit of planning.
So don’t go thinking that if you plant the classic corn/bean/squash mix (called the three sisters) that somehow the beans are going to be feeding the corn and squash. That’s not how it works.

When to plant peas and beans can be surprisingly tricky. Soil temperature is key, and that optimum temperature varies by what you’re planting. Both are normally direct seeded rather than started ahead in trays, though you can certainly do that as well, if you’re careful to not disturb the root when transplanting.
Peas are a cool season crop, meaning they can take a frost and so can be planted early. There’s an old time phenology meme that says “plant your peas when the forsythia blooms”. A few years ago, I finally got around to trying this in our area. It took over 3 weeks for my peas to emerge. Clearly the soil was way too cold in early March. The reality is that pea germination is best when the soil is quite warmed, but you won’t get much fruit set if you plant them too late, as the vines stop growing and setting fruit when temperatures reach about 85 degrees. Timing can be tricky if your summers warm up fast. The “plant as soon as the soil can be worked” adage, in my opinion, does not work everywhere. Look for soil temperatures to be over 45 degrees. Generally, this is about a month before your last frost date, so for Walla Walla, early April.

Peas come in several types; edible pod snow (think flat stir fry peas) and snap peas and “shelling” peas where you discard the pod and just harvest the sweet peas themselves. Shelling peas can either be for fresh eating or soup peas, which are used dried (less common in home gardening seed catalogs). The edible pod types can be more or less “stringy” which is a fibrous piece found along the two edges of the pod. All peas generally do better with some kind of trellis, even if its just bare tree branches draped over the bed in an arch. Planting is surprisingly close, at 2″ apart. Most are about 60 days to harvest. Pease are almost always open pollinated and self fertile, so you can save mature peas and plant them the following year.
The Walla Walla valley grew a LOT of canning peas for a whole lot of years. No doubt they were grown on our property, as we are part of the Blalock Orchard growing area that has been farmed for over 100 years. I’ve NEVER had good success with peas here, or garbanzo beans (I was trying to grow the Hannan pop bean recommended by Carol Deppe) no matter how early or late I planted. The plants would just individually wilt and die unexpectedly, even when it wasn’t hot. So I finally sent a plant sample into WSU’s Plant Diagnostic Lab, paid my $40, and discovered I have Pythium fungus in my soils causing root rot. It’s particularly bad in cool wet springs, which are not uncomon here. And there’s not much I can do about it. So unfortunately, I’ve pretty much given up trying to grow edible peas here, though I often use them in a cover crop in summer.

Beans are a warm season crop, meaning a frost will immediately kill them. So they must be planted after your last frost date. They come in so many different colors and uses. Some, like scarlet runner, can be eaten whole when small and green, as a fresh shell bean (ie the immature beans themselves are shelled and eaten) or as a dry bean. It’s a jack of all trades. And the seeds are HUGE and often purple. So great fun for kids as its a bit of a “Jack and the Beanstalk” bean.

Beans come in bush and pole growth patterns. Bush beans generally stay under 2 ft in height while pole beans can get over 5 ft, and need a trellis to climb on. Fun unconventional varieties to try include edamame (a type of soybean eaten immature), lima (eaten as a fresh shell or “butter” bean or allowed to dry), yard long (an Asian type that needs a very tall trellis), fava (a bean you have to shell twice!) and tepary (a variety native to the southwest that is very drought tolerant).

Beans are generally very self fertile, so once you get a variety you like, its easy to save seed year to year. Just make sure you wait until the outside shell has dried before you harvest or your beans won’t be mature enough to sprout the following year.
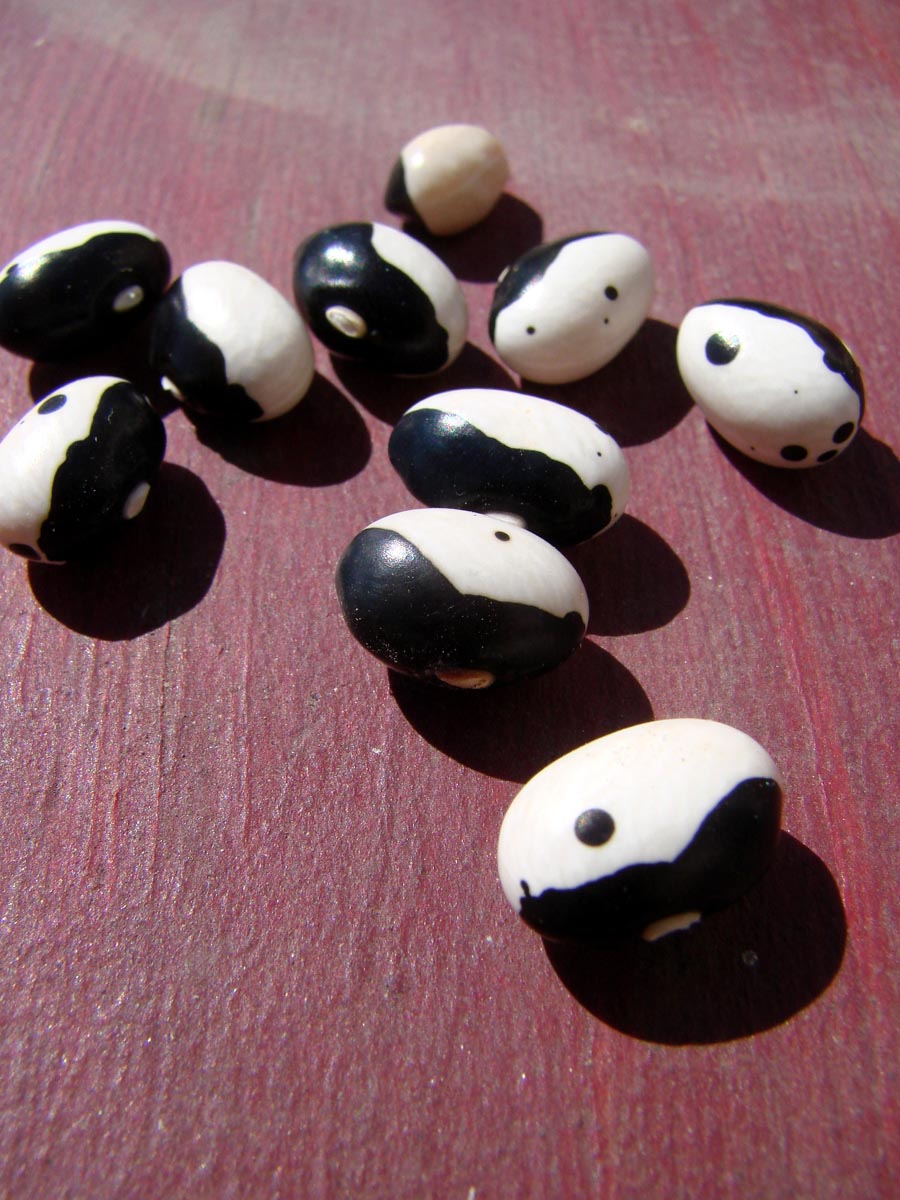
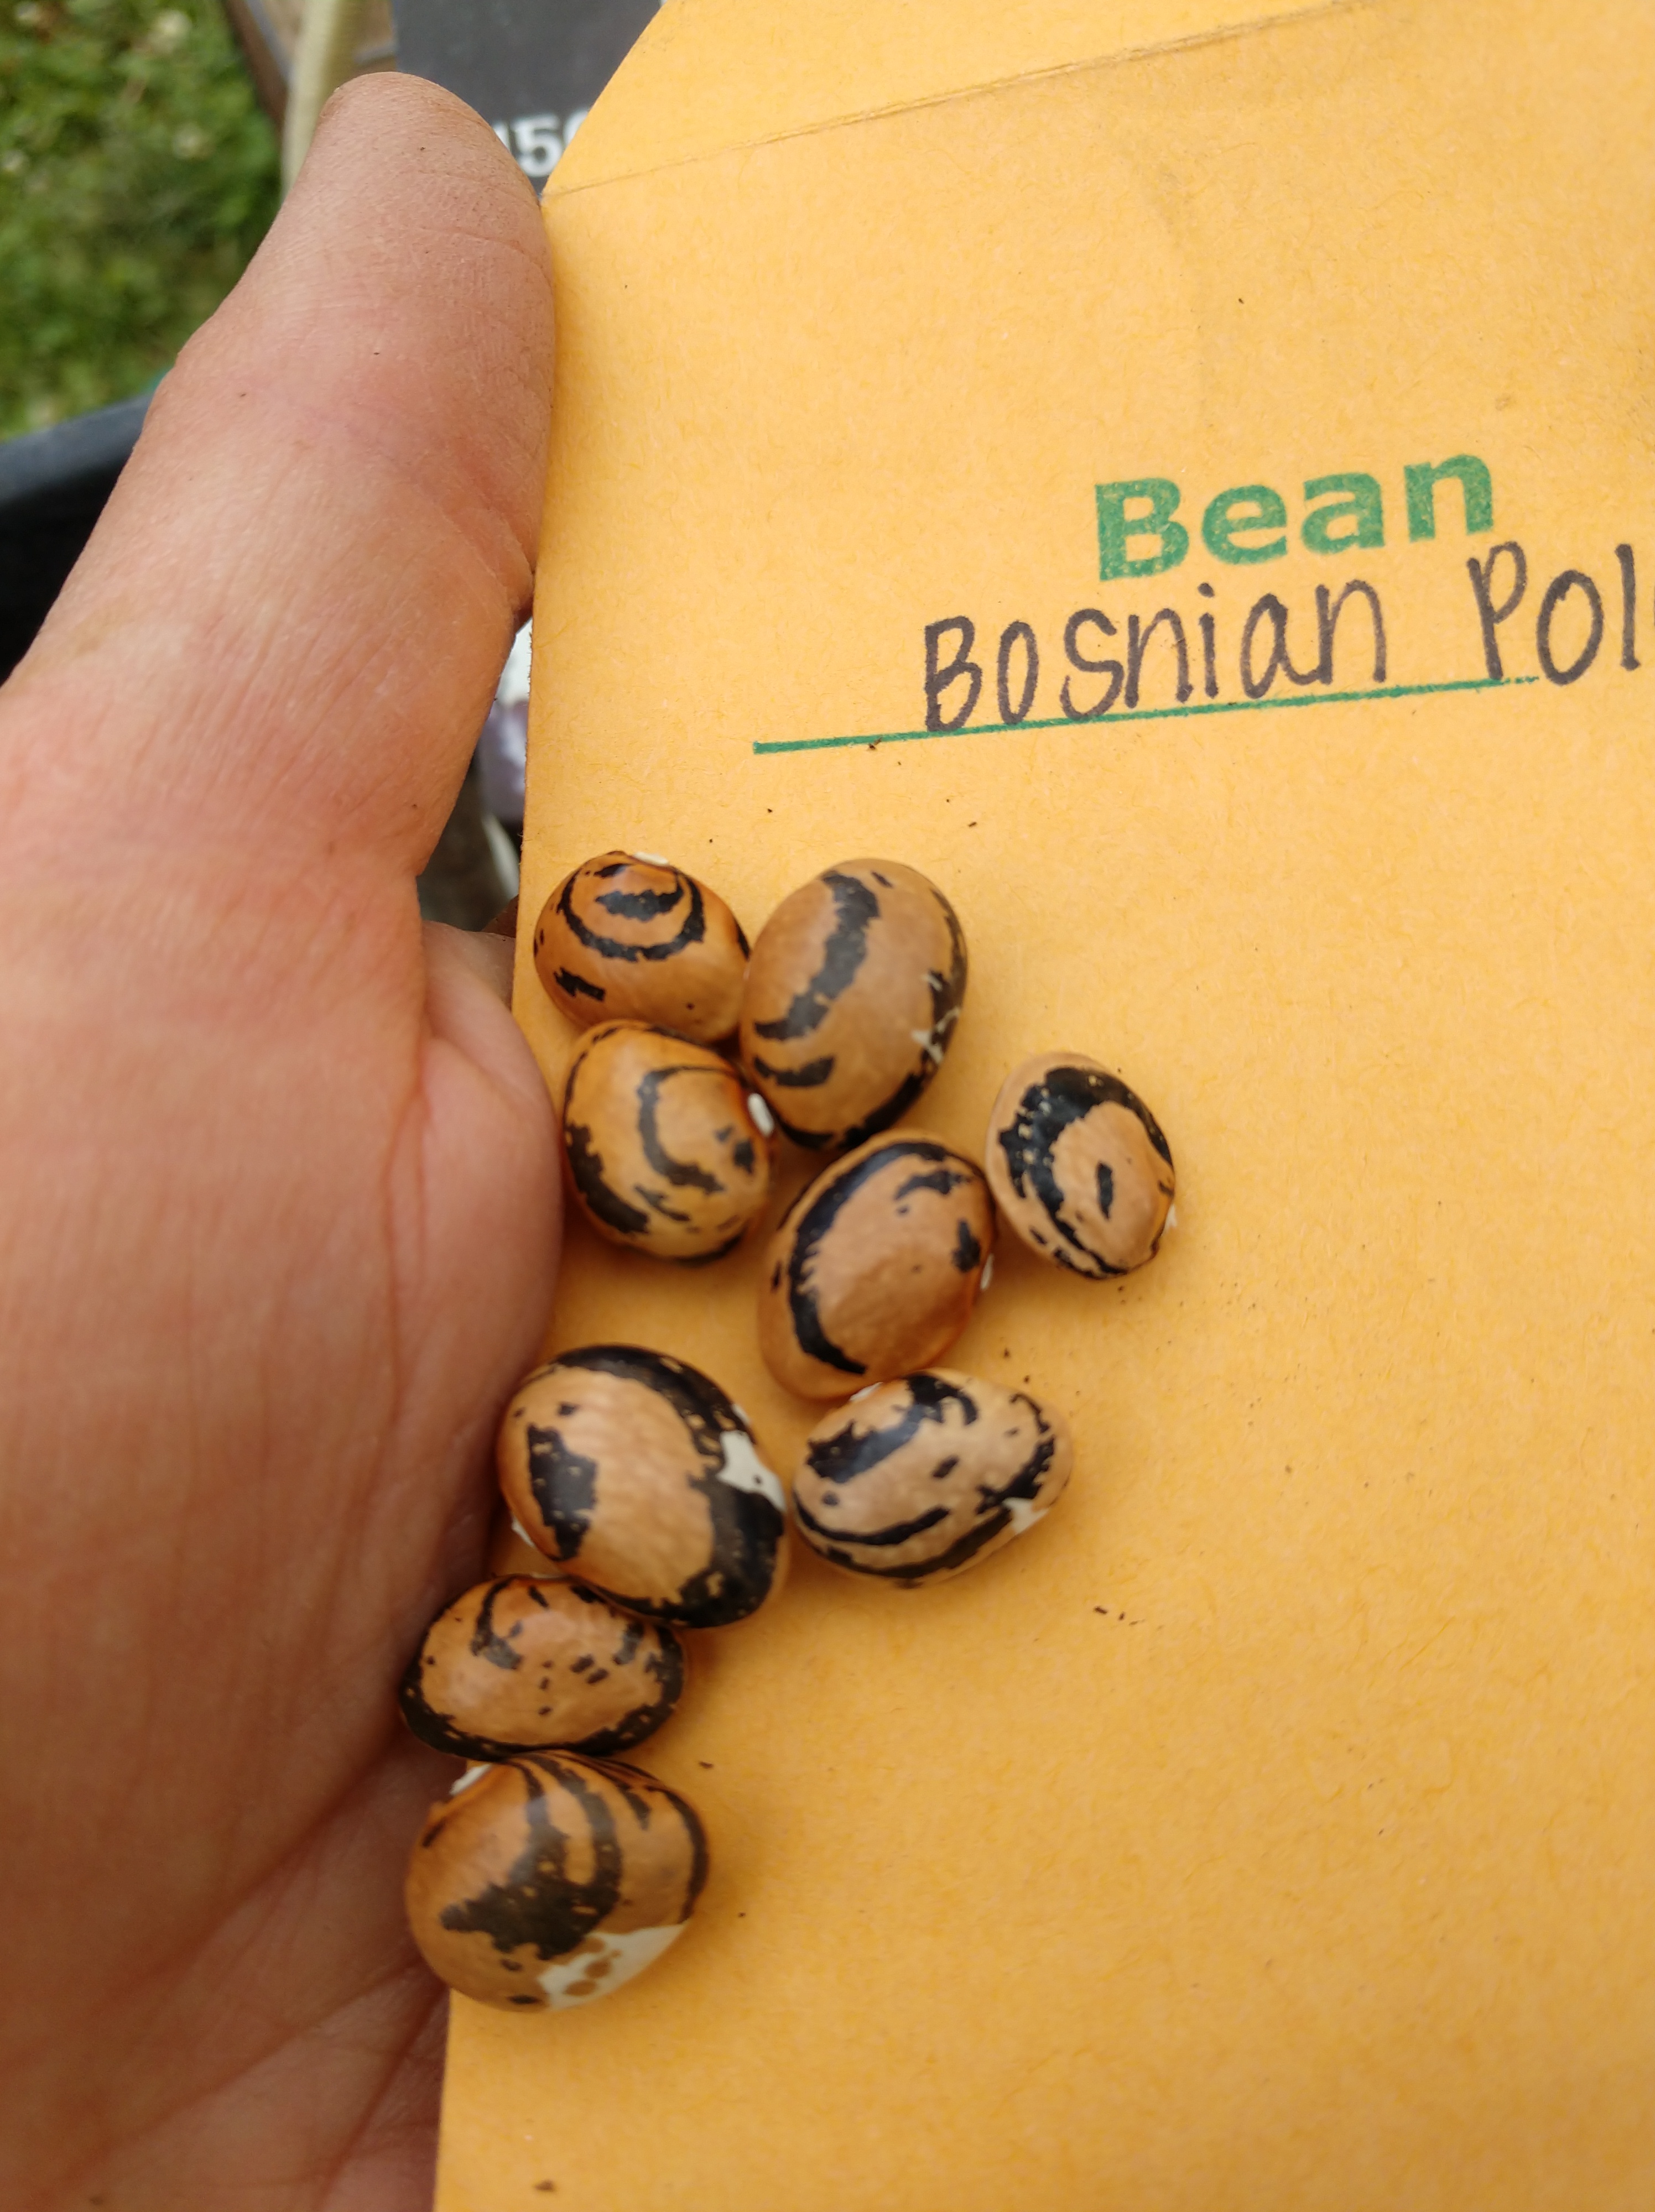
I’ve had better luck disease wise with beans, especially the dry bean varieties. I’ve grown Calypso, Hidatsa Shield Figure, Tiger Eye, Silver Cloud Cannellini, Midnight Black Turtle, Northern Pinto (and various pintos from bulk bins), small Red Chili (from bulk bin at the store), Navy (from bulk bin at store), Kenearly Yellow Eye, Maine Sunset, Whipple Creek, 1500 year old cave and Mayocoba. This year I did a Landrace dry bean mix put together from Joseph Lofthouse. I have been known to buy a bean just because it was beautiful, and then realize it didn’t really fit my climate or gardening style (looking at you Bosnian and Grey Eyed Greasy beans).


I have better luck with bush rather than pole beans (pole beans take longer to mature and don’t seem to thrive during our sometimes very hot July and August). Plus, when you plant a 100 ft row of beans, that’s a lot of trellis. I’ve had to give up growing Scarlet Runner beans, which I adore just for the flower colors alone, because they REALLY don’t do well with our hot summers here. Bush green beans do well for me, but I’m terrible about keeping them picked, so we get a few harvests and I freeze a couple of gallons and then let them go. I like Provider and Fortex for fresh eating. I once bought a multicolored pole green bean mix from Fedco, only to realize why green beans are also called “string” beans. They were the most fibrous green beans I’ve ever eaten, no matter how young I picked them. Sometimes heirlooms deserve to be left behind.

My method for growing beans:
- I plant about the same time I plant corn and peppers. They germinate much better when your soil temperatures are quite warm (at least over 60 degrees).
- Because I’m using a wheel planter and planting a double 100 ft row, I just sprinkle the inoculant onto the soil before I till in the spring, rather than trying to soak/wet/coat the seeds with inoculant (this does NOT work with a wheel planter – I’ve tried it). I don’t presoak my beans for similar reasons (they would break up from the friction and woudln’t fit the wheel plate).
- My wheel planter plants every 3.6 inches, and I rarely thin after planting. I’ll replant in areas with poor germination about 10 days after initial planting if needed, but generally don’t thin much. Plant close enough and the beans will mostly hold each other up.
- I have ongoing issues with gophers and beans. This year, they tunneled along where I had planted, eating each newly planted bean like it was a pez dispenser, hardly leaving a trace. I had to replant about half of my beans once I realized what had happened and make some changes, as I was out of certain varieties when I needed to replant.
- Keep your beds weeded early in the season so the weeds aren’t competing with your beans for light. After the beans get going, they will smother out most other weeds.
- Harvest green beans every few days to avoid large woody beans. If planting bush green beans, plant a new patch every 2 weeks or so for an extended season, as bush beans are a one and done plant. Pole will give you a later but longer harvest.
- If harvesting dried beans, let them dry on the vine as long as possible. If rainy weather is keeping the mature bean pods from drying, you can pull the whole plant and store in a greenhouse or other dry location to continue to dry, and then pull off pods later.
- If you have a large harvest of dried bean pods, I find that throwing them all into a large container and then carefully stomping on the pods will break most of the pods open. The heavier beans fall to the bottom of the bin and you can remove the dried empty pods by the handful (if you have livestock, they often love these dried empty pods). Then winnow the beans and pod pieces, dropping from one large container to another on a windy day, letting the majority of the pod pieces blow away in the wind. The few bits left can be stored with your dried beans (I store mine in 1/2 gallon glass mason jars). When you rinse your beans for cooking, what’s left will float to the surface of the rinse water and can be easily poured off.
- If you have a natural food store with bulk bins and good inventory turnover, you can simply plant beans from the bulk bins with great success. The tricky part? You often won’t know if the beans you have planted have a bush or pole form until they have been growing a month or more. I’ve had to make an “emergency” trellis on occasion.
There is something about having several pounds of home grown dried beans in my pantry that makes me feel like a rich squirrel, even though beans in the store are CHEAP. I know my beans are fresh. I know how they were grown. And the ritual of sitting on the couch, binge watching a series while shelling dried beans while a fire burns in our wood stove just feels late fall cozy to me. (We’ve also been known to shell beans on long road trips). Once the next year’s crop is in, I pressure can whatever I have left of the older beans for quick meals. I don’t always finish eating all the beans from that year’s harvest in 12 months, so I rotate next year’s varieties based on what I’m running out of next. I almost always grow black beans ever year, as it’s what we use the most.

So there you have it. The amazing legume family, keeping humans alive in both the old and new worlds for millennia. What’s your favorite legume?
© 2021 Miles Away Farm, where we’re miles away from exploring all that legumes have to offer, but grateful for a pantry of them come winter. Want more content? Sign up for a monthly newsletter to your email inbox HERE.

Leave a comment
Comments feed for this article